Phase 1:
Writing code for the .NET nanoFramework is done using the Visual Studio IDE ( Integrated Development Environment ). The language we’ll be writing in is C#. Both Visual Studio and C# come from Microsoft, and are around for a long time already, so you’ll find them very mature with lots of documentation available.

There’s a very good ‘Getting started guide’ by the guys from the .NET nanoFramework itself. You can find it here. However, i’ll provide some detailed steps below as well.
Installing Visual Studio and the .NET nanoFramework extension
Visual Studio comes in a few versions, including the Community edition which is free. Free doesn’t mean there are restrictions built in, it just means some very high level features are left out. So, go ahead and download the community edition installer.
When the installer runs, it will ask you what Workloads to install. For our purposes we need the .NET Desktop Development workload.
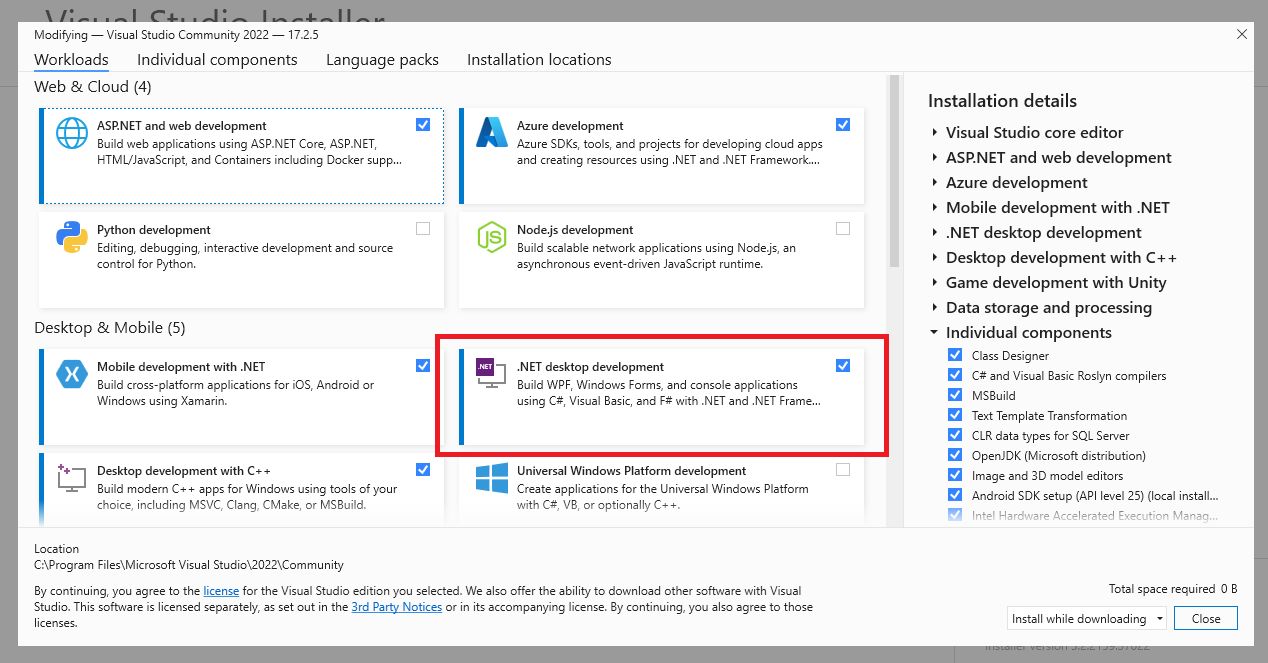
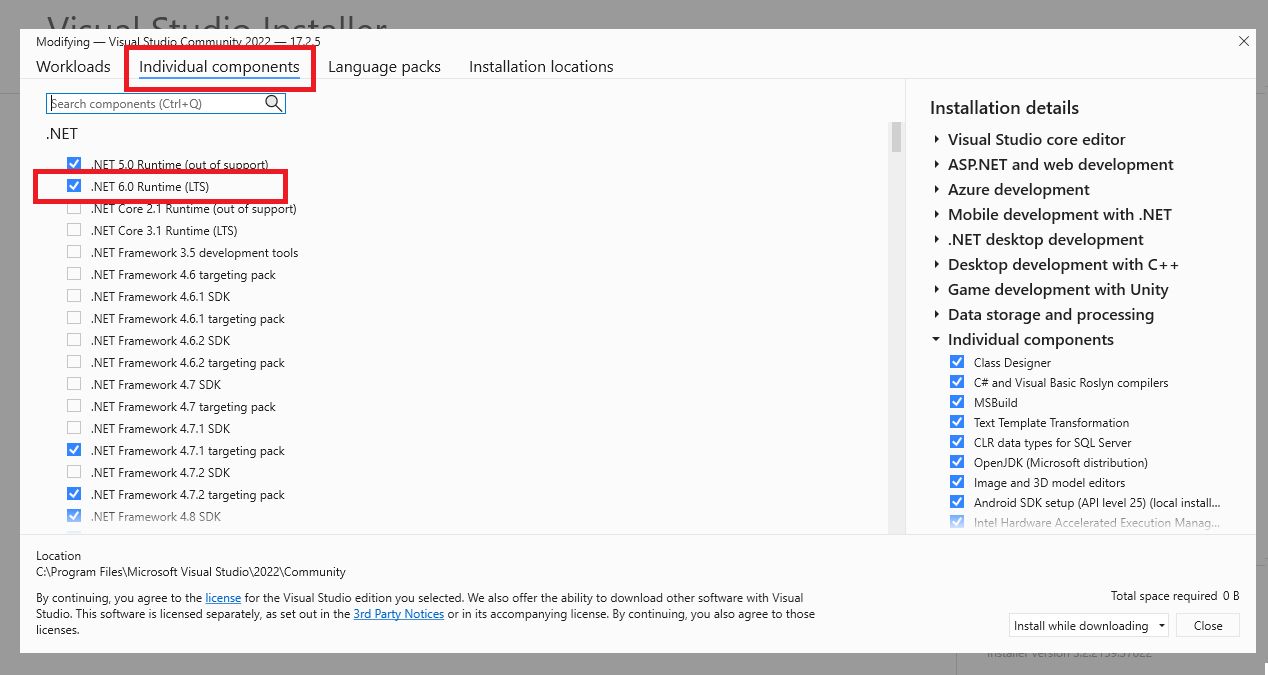
Also, on the ‘Individual components’ tab, select the .NET 6 Runtime.
Now you’re ready to install Visual Studio, so please do.
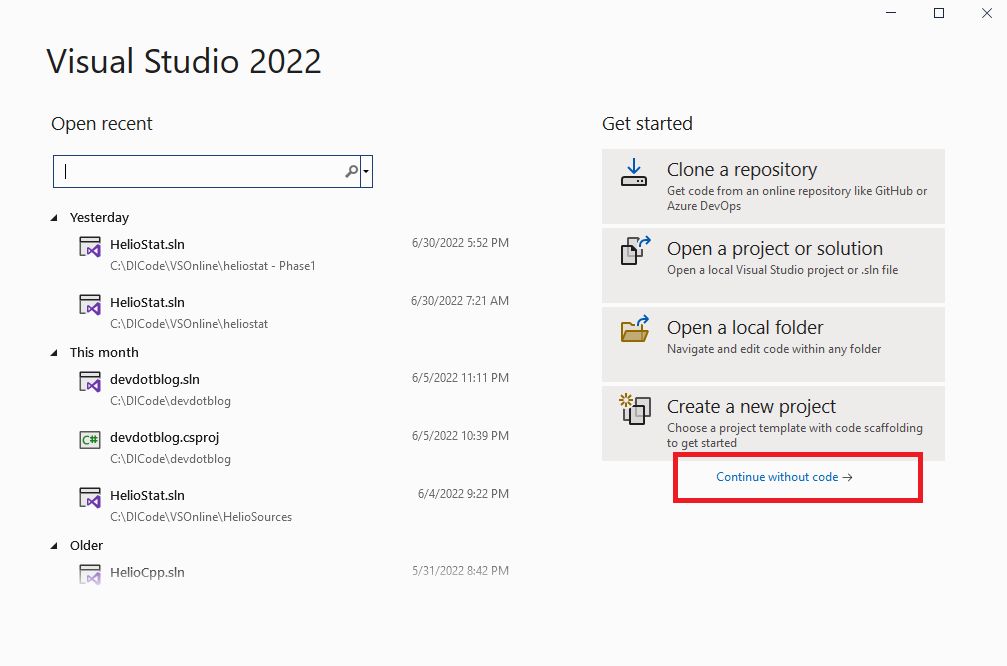
With Visual Studio installed, we still need to add the extension that allows us to deploy and debug .NET nanoFramework projects. When you run Visual Studio for the first time, choose to start it without opening or creating a project.
Next, in file menu, click on ‘Extensions’, and then ‘Manage Extensions’.

In the dialog box that pops up, enter ’nanoframework’ in the search box.
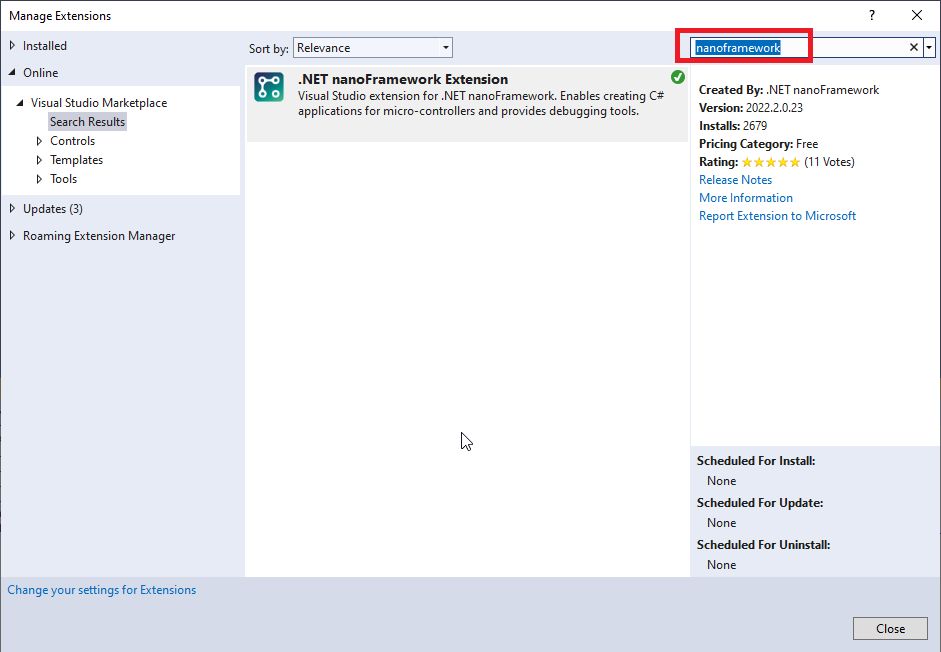
As a result of the search, you’ll see the ‘NET nanoFramework Extension’ displayed. On my PC i already had it installed, so there’s no ‘install’ button for me, but of course, do press that button when needed.
The install process will ask you to restart Visual Studio, so do that. Once done, Visual Studio is ready.
Flashing the ESP32 board with the .NET nanoFramework firmware
Flash tool
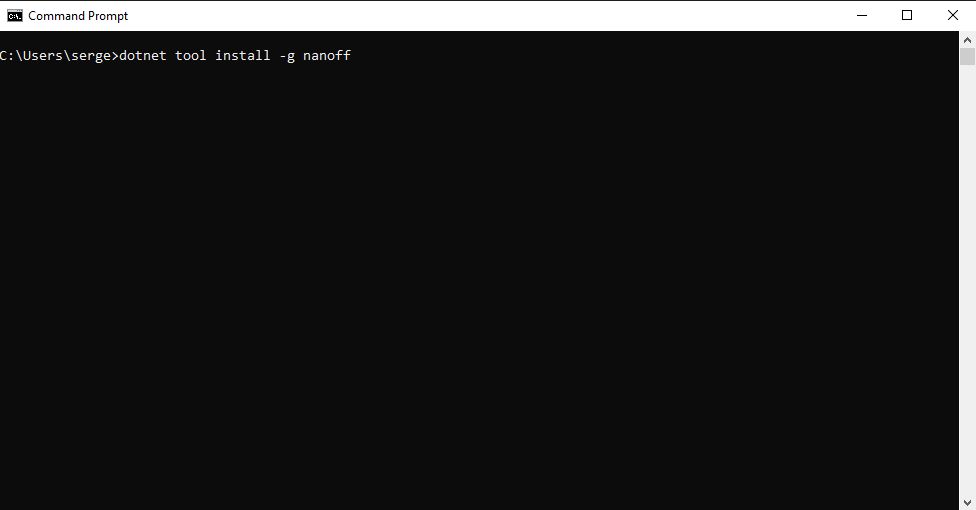
First we need to install the flash tool, called ’nanoff’, on our PC\Laptop. Open a command prompt ( enter ‘cmd’ in the windows search box on the taskbar ), and issue this command:
dotnet tool install -g nanoff
’nanoff’ is a command line utility, and requires some parameters, like COM port and which firmware type to flash to out board.
Finding the correct COM port
The ’nanoff’ tool expects us to tell on which COM port our ESP32 board is attached to. To find the correct port number, open ‘Device Manager’. Note that you can find it by just searching for ‘Device manager’ in the windows search box in the task bar.
With the Device Manager open, find the ‘Ports (COM & LPT) node, and open it. It will show you a list of available COM ports.
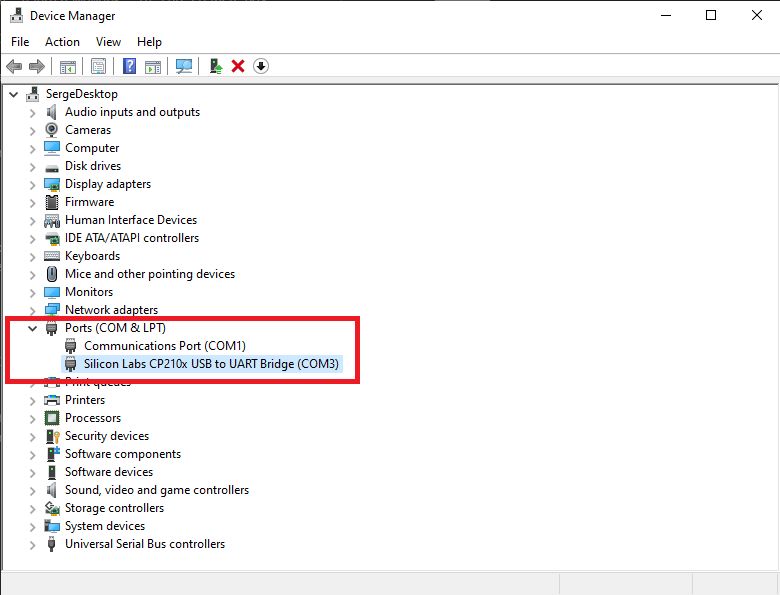
To know which one is ours, just connect your ESP32 board to your PC with a USB cable, and see what COM port is added.
If connecting\disconnecting the ESP board does not result in a change of ports displayed, then your PC probably has no driver installed for the ‘USB to COM port’ translation. That driver can be found here: usb-to-uart-bridge-vcp-drivers

With the driver installed, go back to Device Manager, connect\disconnect your ESP32, and you should see it appearing\disappearing now.
In my case, the assigned COM port is COM3.
Which firmware to install?
This depends on a couple of things:
The hardware you are using. The WROOM and WROVER microcontrollers need a different firmware.
For any given microcontroller, multiple firmware types might be available, with different supported features.
When you write code for the .NET nanoFramework, you almost always use some libraries that come in the form of Nuget packages. These packages are written for a specific version of the firmware, so we have to make sure to install the correct version of the firmware.
As i explained earlier, When i started this series, i was using the WROOM board, and later switched to the WROVER one. So, i’ll provide the reasoning for the firmware selection for both boards.
WROOM board
TL;DR: You can skip this and go straight to the explanation for the WROVER board.
Firmware type
On the page with compatible devices we see that the WROOM board supports these firmware types: ESP32_REV3, ESP32_REV0, ESP32_BLE_REV0. Since we need Bluetooth support, we need the ESP32_BLE_REV0 firmware. ( the BLE stands for Bluetooth Low Energy )
Firmware version
Since our project requires Bluetooth, we need the Bluetooth nuget package ( nanoFramework.Device.Bluetooth ). When i wrote the code for the WROOM board, Bluetooth support for the .NET nanoFramework was still under active development. The version of the nuget package that was available is 1.0.0-preview.17. This nuget version requires version 1.12.0-preview.5 or later of the nanoFramework.Corelibrary nuget package.

This nuget package has a dependency on the firmware using version 100.5.0.16 of mscorlib.

So now we need to find the version of the ESP32_BLE_REV0 firmware that has this version of mscorlib.
Unfortunately, i do not know an easy way to find the firmware version that contains a specific version of mscorlib. All available versions are listed on CloudSmith. I looked at the time the Bluetooth package was released and searched for a firmware version that is released around the same time. That version is 1.7.3-preview.282.
The direct link is: 1.7.3-preview.282. There’s a download button on the page to get the actual zip file containing the firmware bin file. Download and unzip the file, and remember the path were you unzipped it.
Flashing the downloaded firmware
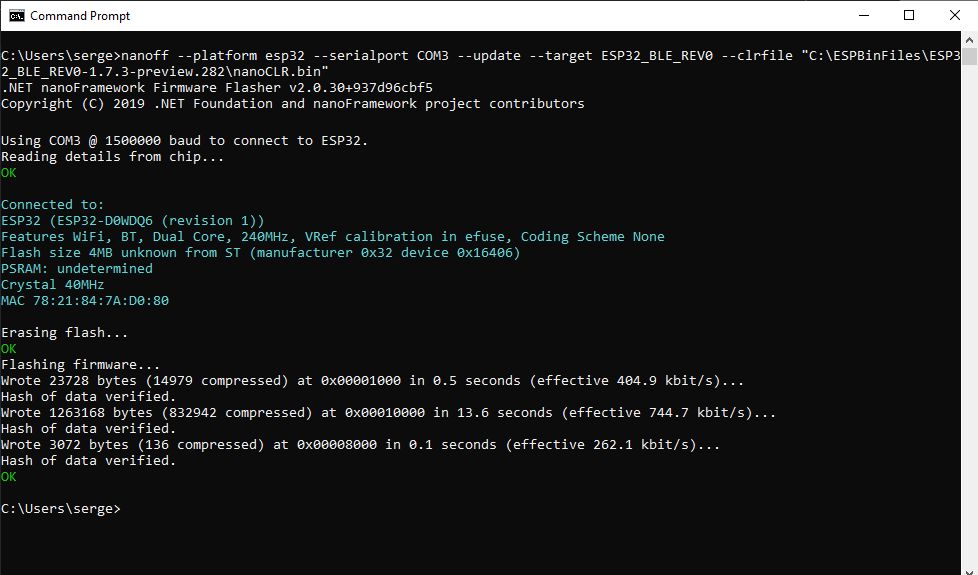
Next, let’s use our downloaded firmware when invoking the tool. Substitute the folder name with your local path.
nanoff --platform esp32 --serialport COM3 --update --target ESP32_BLE_REV0 --clrfile “C:\ESPBinFiles\ESP32_BLE_REV0-1.7.3-preview.282\nanoCLR.bin”
Note the ‘COM3’, substitute this with whatever your COM port number is.
This results in an output like this:
WROVER board
For the WROVER board we’re using firmware version 1.8.0.545. Note that nanoff allows you to specify the version number. When you run the command, nanoff will download the specified version and flash the board.
nanoff –platform esp32 –serialport COM3 –update –target ESP32_BLE_REV3 –fwversion 1.8.0.545
Note the ‘COM3’, substitute this with whatever your COM port number is.
Checking if Visual Studio can see the ESP32 board
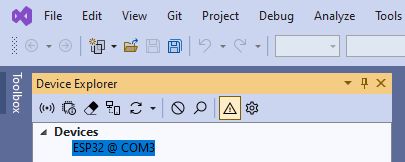
Now that all is installed, let’s see if Visual Studio is able to see our board. Start Visual Studio, open it again without code, and open the ‘Device Explorer’ window. If it’s not immediately visible, you can open it from the file menu like below and keep it docked afterwards.
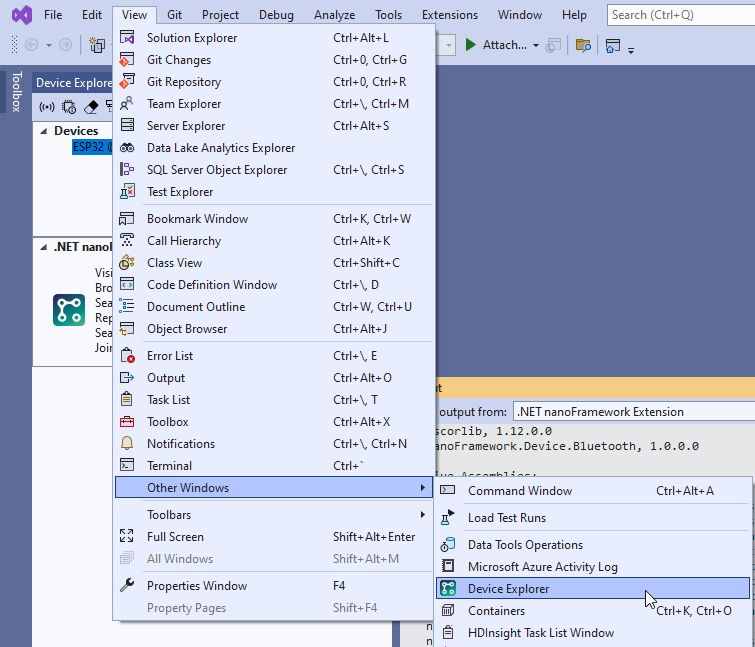
When the board is connected to your PC, you should see it listed.
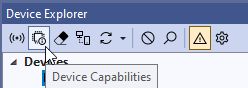
If not, disconnect\connect it again to your PC. To check that the correct version of the firmware is indeed present, press the ‘Device capabilities’ button of the Device Explorer.
As a result Visual Studio will now query the board for some internal information and display that in the output window.
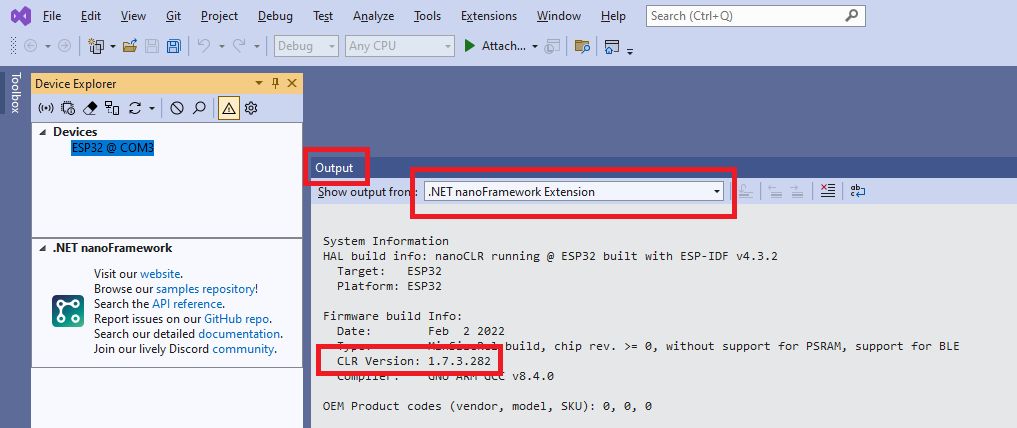
As you can see above, the CLR ( Common Language Runtime ) version is 1.7.3.282, the same as the bin file we downloaded and flashed. At least if you followed the instructions for the WROOM board. The WROVER version will be whatever the latest version is at the time you used the nanoff tool without specifying a specific version.
Conclusion
We installed Visual Studio and the .NET nanoFramework extension. We learned how to connect our ESP32 board with our PC and flash it with a specific firmware version. Lastly, we checked if Visual Studio can see and communicate with the board.
We’re now ready to start writing code for our board, but that’s for a next time.